Google Chat - Spaces

If you haven’t discovered Google Chat, you are missing out. The tech department uses this all the time to communicate with each other and other people on campus. It is like texting, but it is easily accessible within your email. Plus, it works well on mobile.
Anyway, we are going to discuss a specific part of Google Chat in this tip. Spaces.
Spaces is designed for group collaboration. It allows you to organize conversations into threads, collect shared documents into a common space, collect and assign tasks, and install additional apps for things like polls.
Setting Up a Space
Create a new space
- Visit mail.google.com
- Click on the “Chat” button in the left menu

- Click “New chat.”

- Click on “Create a space”

- Enter a name, and choose to add an emoji if you want to.
- Make sure to choose “Collaboration.” Announcements has a purpose as well, but it isn’t what we are currently looking for.
- The access settings section should USUALLY be left as it is. Again, there are exceptions, but make sure you think about changing these carefully.
- Click create.


Accessing a Space
- Visit mail.google.com
- Click on the “Chat” button in the left menu
- On the left, click the name of the space you are looking to participate in.

Add People to a Space
- Inside a space, click the name of the space.
- Click on “Manage members”
- Click on the “+Add” button
- Type in the names of the people or groups you want to add to the space.
- When you have everyone added, click on the “Add” button


Add an App to the Space (using polls)
a
- Inside a space, click the name of the space.
- Click “Apps & Integrations.”
- Click on “Add apps.”
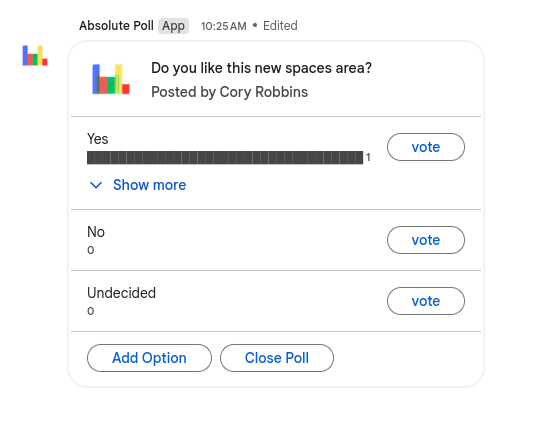
- Select the app of your choice from the list. I’m going to select “Absolute Poll” to allow voting on questions in the Space.
- Click the “Add” button.
- Once added, you will often get a message from the app that provides instructions on how to use it. For example, since I added the poll app, I can type:
/polland then hit enter, I’ll get a form. I can provide the requested information (I don’t have to put 4 options, and scrolling provides more settings), and when I “Submit,” I’ll get a poll for the users.


Using a Space
Threaded communication
When a message is posted in a space, replies become “threads.” This concept is just organizing a conversation. Think about threads as topics of discussion.
To start a thread, it is as easy as sending a message. The magic happens on the replies.

- To reply, I’ll hover my mouse over the message I want to reply to.
- I’ll then click on the little word bubble icon
- You will now see a split screen with the main space on the left, and the thread on the right.
- I’ll then type my reply in the RIGHT side reply box.
- when I’m finished typing, I’ll hit enter, or I’ll click the airplane icon.
- This does two things. First, it adds a reply indicator to the original message. Clicking on that will open up the thread. Second, it adds the response under the original message to the right side of the screen.


Viewing All Space Threads
To view all of the treads that are in a space, click on “Threads” in the top right corner of the space.

This will open your screen in a split view, and you will be able to see all of the threads for the space on the right side of the split.
Quoting Conversations
Sometimes it is helpful to quote a message.
Please note that this will NOT create a thread.
- To quote, I’ll hover my mouse over the message I want to interact with.
- You will see the quoted message and a reply box.
- Press enter or hit the airplane button.
This will result in a message with the quoted text above what you sent.


Knowing When There is a Message
There are two primary indicators to let you know you have a new message in a space.
First, like your email, the chat icon will show the number of unread messages you have waiting for you.
Second, in the bottom left corner of your email inbox, there will be a stack with the icons of the spaces you have unread messages in.
Adding Drive Files to a Space
Of course, you can share a file like normal, but it is often helpful to have files in a collective area along with communication.
- Inside the space, click the circled plus button next to the message box.
- Click the “Google Drive” option.

- If the file already exists in your drive, click on “Attach a Drive file.” If you want to create a new file and automatically share it with the members of the space, choose one of the other options.


You will then be prompted to pick the file you want to share or to add a name for the new file you are about to create.
If you created a new document, that will open in a split view, but whether the document is new or attached, you will get an icon, and in the lower right corner of the icon, it will allow you to open it in split view.

There is plenty more you can do inside of Spaces. Hopefully, this is enough to get your collaboration efforts started though!